
Design
Hey guys,
I’ve been watching the new season of Battlebots 2016 (or is it called Battlebots 2019 now?) and I’ve been getting inspired (uh oh)! I also run the 3D printers at my local library, and I was talking to my friend at another branch, and we both decided it would be a great idea to start an Inter-branch Library Combat Robot League, or ILCLR. Yeah, the name needs a little work.
So, where do we start? Well, as the conversation with my library buddy was a little one-sided on the whole “abandon all your responsibilities and build a robot” front, I’ll probably be making my robot first. Luckily, I’m armed with a (fairly unique) design own of my own and a complete and utter lack of self control! Introducing…
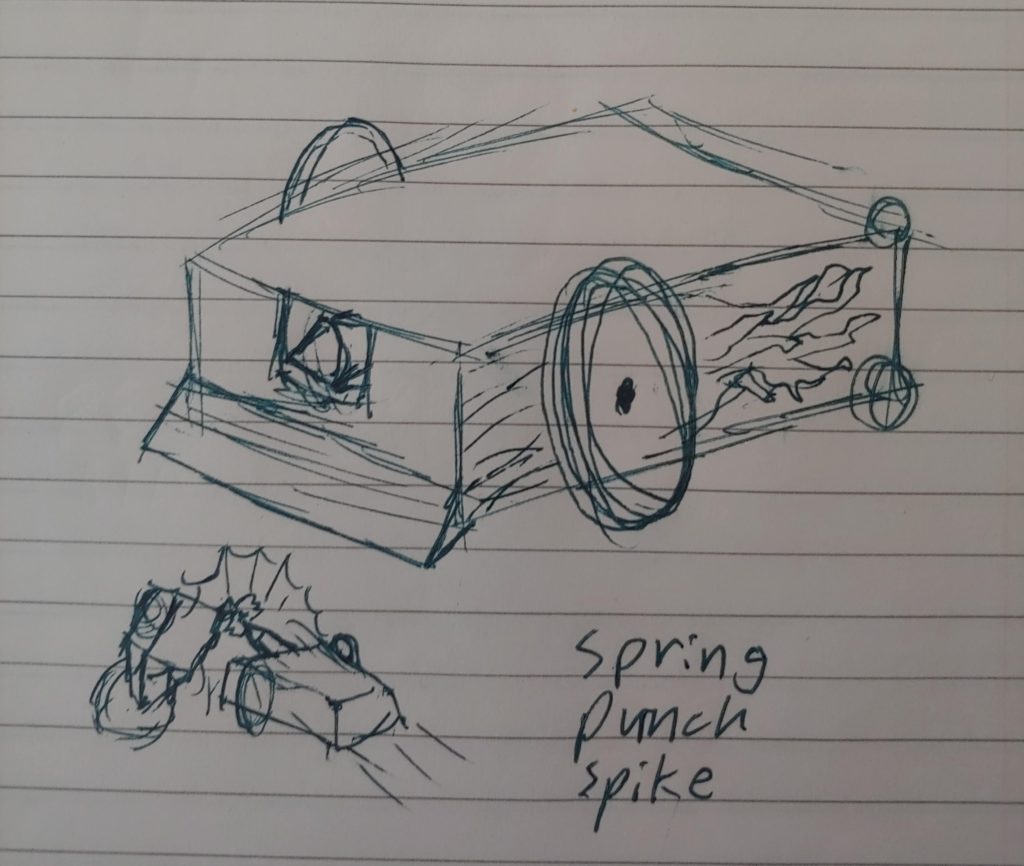
PERCUSSIVE MAINTENANCE
Based on the repair technique of the same name, PM’s purpose is to hit. Hard.
Now I could have just build a generic mini-tombstone spinner, but how am I supposed to get unreasonably frustrated with a design that simple? Nah, this is where it’s at.
Let’s talk about the design, of the weapon specifically. Percussive Maintenance uses a spring driven spike to punch its enemies, with untested success. The spike itself is pushed by a strong, compressed spring, which is reloaded by a small linear actuator. Here’s a drawing that should hopefully make it a little clearer:
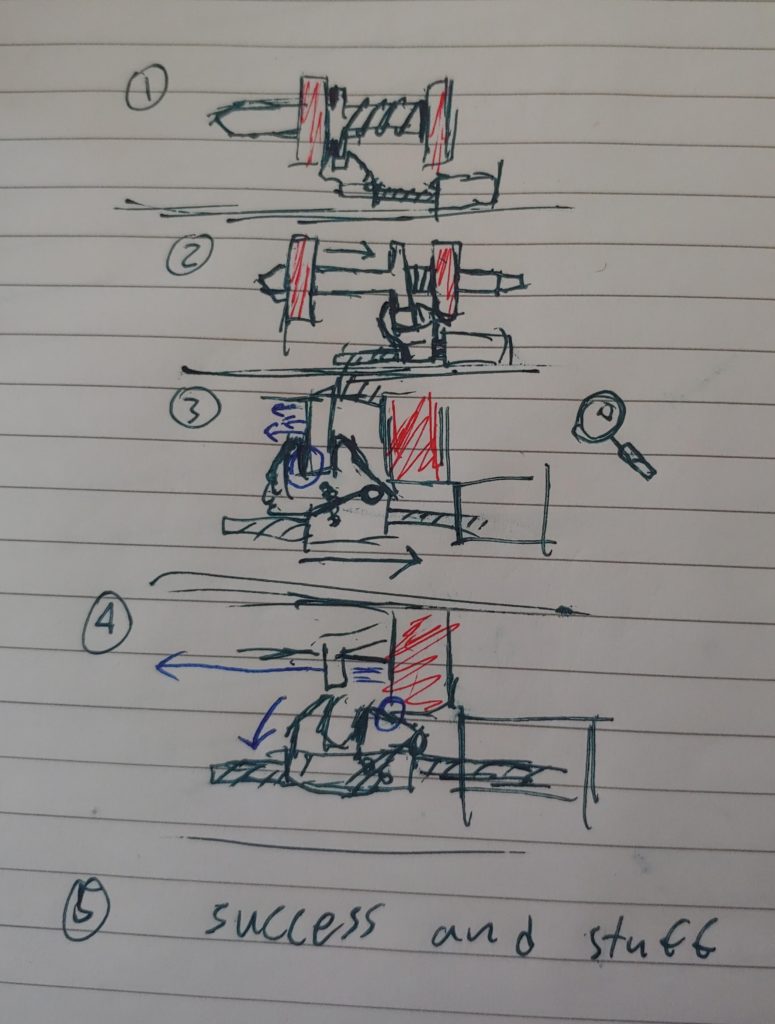
This concept is heavily inspired by Emiel Noorlander AKA @thepracticalengineer‘s nut cracker design, in which you can see the spring and release mechanism more clearly:
The body is still a WIP, but I’m hoping to keep it pretty simple. I was thinking of using a “frame and panel” style design, with metal or plastic pieces in the corners with plates of carbon fiber/G10/plexiglass covering the sides.
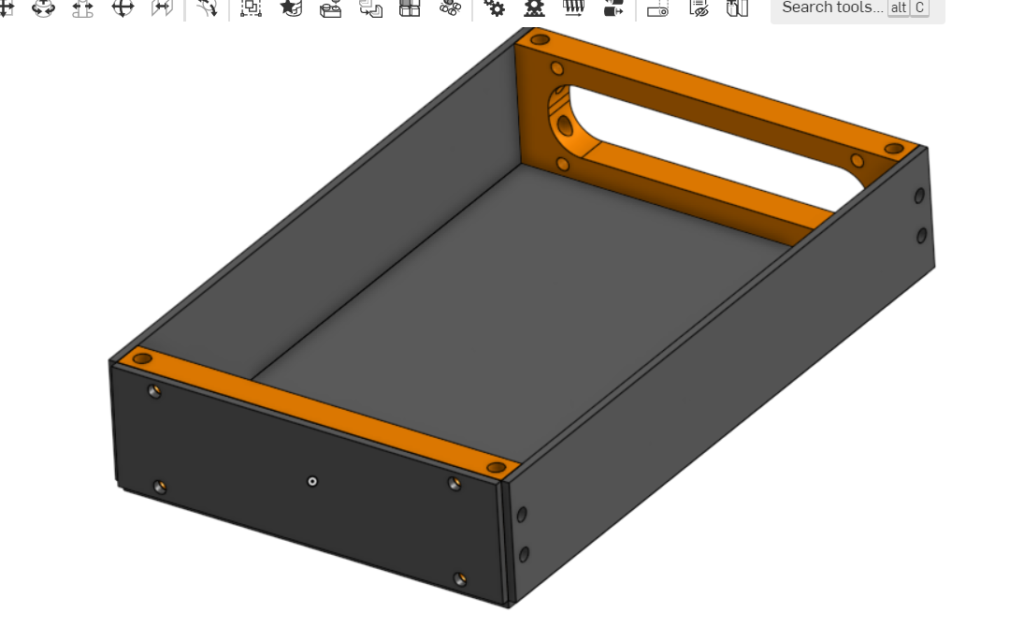

Hopefully, the panels will cover the side and top rigidity, with the hard frame filling in the rest. If this doesn’t work out, I can always switch to a 3D printed unibody design, but I really don’t like the idea of swapping out the entire body if one thread strips out or something.
Parts
For parts, I gathered my inspiration from Alta’s Projects and Robert Cowan’s Antweight, SGT Cuddles (both amazing channels, btw). I’m buying the absolute cheapest versions of most of these parts with the understanding that they will undoubtedly bite me in the ass later if I don’t swap some things out in due time.
- ESC: Dasmikro 2S6A Micro Bidirectional Tank/Crawler ESC. (Revisiting the page, I’m noticing that it doesn’t have any braking. Cripes).
- Motors: Sparkfun/Pololu Micro Gearmotors, 460rpm.
- Wheels: 32x7mm Generic.
- 3-Terminal Micro Switch. (This should turn on an LED to let me know that the weapon is reloaded)
As it turns out, small linear actuators are pricy as hell. However, as it also turns out, I had some multirotor retracts I wasn’t using, which are basically the same thing. Oh, and I’m just using the circuit board out of an old servo to control it. Can’t wait until that burns up in my face.

I have two sizes, and I think I’ll go with the larger one just because it’s much stronger (which should make up for the lack of travel). Unfortunately this does add some weight (the large one weighs in at 49g, whereas the small one is a measly 22g), but it should add some much needed reliability as well.
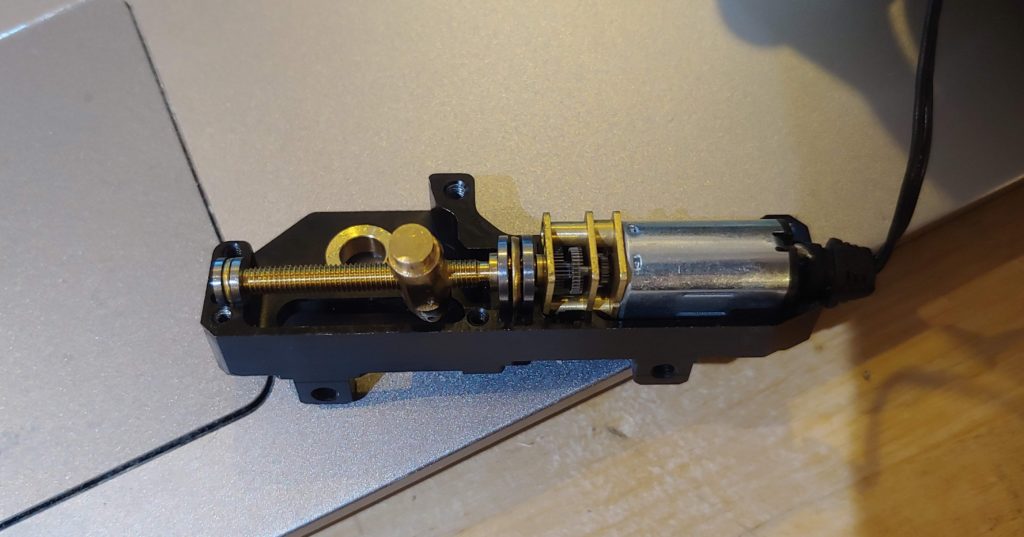
Plus, I should be able to shave off the entire hinge mount with a Dremel, putting it on a serious diet. We’ll need that weight if we’re gonna have an effective spike.
Challenges
For one, I’ve never build a Battlebot before. Also, I’ve never driven a Battlebot before. It’s easy to yell at your TV and wonder “Why didn’t he just do XYZ, he would have won!” but that’s much harder to put into practice.
I also don’t have many combat robot events near me, at least that I know of. I have no idea how many spares to bring or how much money to dump into this.
Oh yeah, and I ordered a brake-less ESC by accident. Go me!
Conclusion
So yeah, thats the plan. Put it together, kick ass. See you when the parts arrive!
PS: Feel free to leave a comment if you have any questions!
https://waterfallmagazine.com
I’m not that much of a online reader to
be honest but your sites really nice, keep it up! I’ll go ahead and bookmark your site to come back later.
Cheers
Thank you for the kind words! I’ll get some more articles on here for you